How Layers Can Help You Create Better Flat Lays
Ever wonder why certain flat lays hold your attention longer than others? And how you can't quite put your finger on why that flay looks so much better than others you've seen? It's pretty likely that the flay lay has many layers within it which creates dimension. To understand what the different layers an be, let's look at the example below:
1. Start with Your Base Paper
Decide which pieces of paper will be underneath the whole flat lay and can lay directly onto your styling mat. It helps to lay your whole suite out to visualize which pieces will be on the bottom.
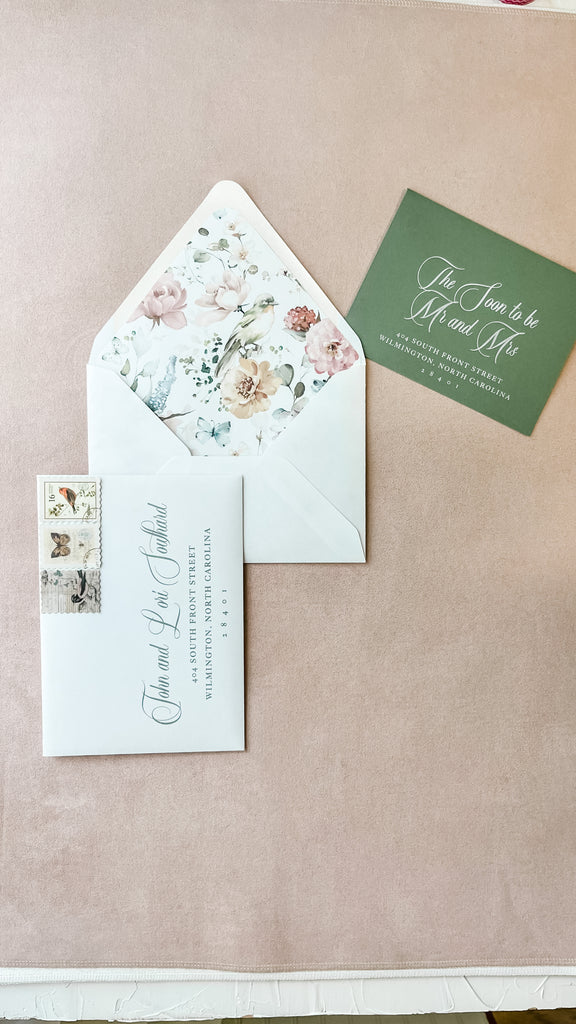
2. Add Risers
Adding risers are the best way to give your flat lay dimension. They can be anything from traditional acrylic blocks to books to trays and dishes. It's something your next layer of paper will lie on. Here I used acrylic risers and a book.

3. Add Your Second Layer of Paper
Add the rest of your invitation suite onto your risers.

4. Add Your Details
This is the fun part! Now is when you can add all of the pretty details like flowers, stamps and wax seals. You can use details to fill in any holes you might have in your layout. And voila!

I hope that was helpful and gives you an idea on how I set up my flat lays! I'll have more tips and tricks coming soon so stay tuned!